Following my previous post on how to set up DDEV and install Drupal. In this post, I go over how to customize your DDEV installation. Why, you ask? Well, suppose you're working for a client with a PRE/PRO server set up with LAMP or LEMP and uses a specific version of PHP and a specific version of MariaDB. Indeed, you don't want to run a different version of PHP and MariaDB on your local machine. This is where DDEV comes in handy. You can easily set up your DDEV installation to match the server environment. This way, you can ensure your code will work on the server.
Configuring different versions of PHP and MariaDB
So, PRO is running PHP8 and Mariadb 16. To match this on your local machine, you can run the following command:
ddev config --php-version=8.0 --mariadb-version=16
ddev restart
And voila! You're now running PHP8 and MariaDB 16 on your local machine.
Running xDebug
By default, on every DDEV project you create, DDEV has xDebug disabled. A simple ddev xdebug enable will enable it, and you're good to go! Remember that whenever you restart your DDEV installation, you'll need to rerun this command. If you want to enable xDebug permanently, you can do so by editing the config.yaml file located under .ddev
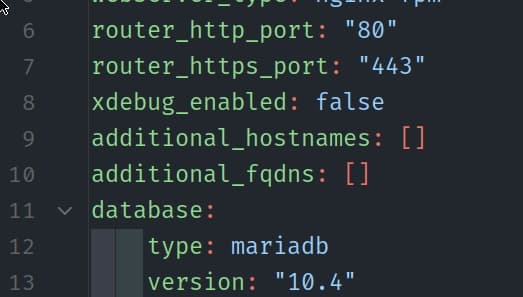
xdebug_enabled: true
Xdebug with WSL2 + Docker CE
As I mentioned before, enabling xdebug in DDEV is easy, as long as you're using Docker desktop. If you're using Docker CE with WSL2, you must do additional steps to get xdebug working. Follow the steps below to get xdebug working with WSL2 and Docker CE.
Option 1: Remote development
So whether you're using VsCode or PHPStorm, they offer a way to develop inside WSL2 using a remote development extension. This way, you can run your code inside WSL2, and xdebug will work out of the box.
Option 2: PHPStorm on Windows
In this example, you're running PHPStorm on Windows and want to add the project, like you'd add a normal local folder.
I had to go through a workaround to make it work. After countless hours of browsing the internet, I found a solution that worked for me, but before I go over the steps, be sure to install the DDEV plugin for PHPStorm, as it'll make your life way more accessible, it'll take care of setting up the server and the debugger settings for you.
- First, from your Windows terminal, once you're inside your Ubuntu Distro, run
cat /etc/resolv.confand copy the IP address that's to the right ofnameserver

- Copy the IP address and create the file
.ddev/php/xdebug-localhost.iniand add the following lines:
xdebug.client_host=THE_IP_ADDRESS_YOU_COPIED
- Restart your DDEV installation
_Note: I had to go through the setup again while writing this post, and xDebug wasn't working. I knew my installation was correct, and the settings were right too, and after 40 minutes, I remembered what happened last time: Windows Firewall settings were on, and they were blocking the connection. So if you're having the same issue, either deactivate the Firewall or add a custom rule to allow incoming/outcoming traffic _
Option 3: PHPStorm inside WSL2
This option was working for me at first when I could not make the usual PHPStorm work with xDebug and was using an old version of PHPStorm in which the remote PHP interpreter couldn't be set up. But after it worked, I no longer needed to use this option. But I'll leave it here in case someone needs it:
snap install phpstorm --classic
That's it; once you've downloaded it, you can run it directly from Windows. It uses Wslg in the background. So you can run it directly from Windows, and it'll open inside WSL2. And xDebug will work out of the box.
Additional settings with PHP.ini
If your project requires you to set some additional settings to php, do the following:
Locate the .ddev folder, which will be at the root of every project you create, and inside create a folder called php. Inside that folder, create a file called php.ini. That's it; now you can add any settings to this file and restart your DDEV installation.
And That's it for today! I hope you found this helpful post. If you have any questions, please contact me on LinkedIn.
Happy coding!